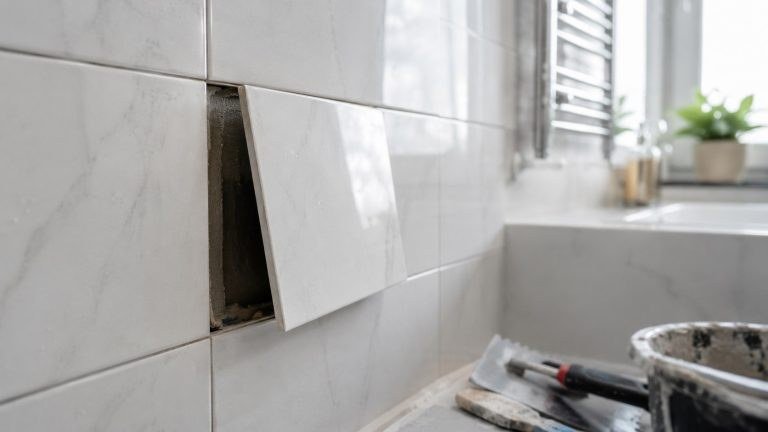
One cracked tile in an otherwise perfect bathroom floor. It’s the kind of thing you notice every single time you walk in, and it makes the whole room feel neglected. The good news: replacing a single broken tile is one of the most satisfying DIY repairs — it takes about an hour of active work (plus drying time), costs under $20, and the result is genuinely invisible when done right. Here’s the exact process.
How to Replace a Broken Tile in Your Bathroom
What you’ll need ($15-$25 total)
- Replacement tile (see below on matching)
- Grout saw or oscillating multi-tool with grout blade ($15-$25 — the multi-tool earns its keep on many projects)
- Hammer and cold chisel (or just a hammer and old screwdriver)
- Tile adhesive/mastic (small tub, $8-$12) or thinset mortar
- Notched trowel or putty knife
- Grout (small bag or tube of pre-mixed, $8-$12)
- Grout float, sponge, bucket
- Safety glasses and work gloves (non-negotiable — tile shards are razor sharp)
Step 1: Match the tile
This is the hardest part of the whole job. Take a photo and measurements to a tile store — if it’s a standard white subway or common ceramic, you’ll likely find a match. For discontinued tile, check: the Habitat for Humanity ReStore, eBay, or tile salvage shops. Failing an exact match, consider replacing a small cluster of tiles with a deliberate accent pattern — a 2×2 decorative insert looks intentional where one mismatched tile looks like a mistake.
Pro move: when you do find the match, buy 3-4 extras. Future you will be grateful.
Step 2: Remove the grout around the broken tile
Use the grout saw or oscillating tool to cut out the grout on all four sides of the damaged tile. Go about 2/3 of the grout depth — you’re isolating the tile so removal doesn’t crack its neighbors. This is the most tedious step; take your time. Rushing here is how one broken tile becomes three.
Step 3: Break out the old tile
Put on safety glasses. Starting from the center of the broken tile (it’s already compromised there), tap with hammer and chisel to break it into pieces, working outward toward the edges. Always chisel toward the center, never outward toward neighboring tiles — outward force cracks the good tiles. Remove all fragments, then scrape the old adhesive down to the flat substrate. The new tile needs a level bed; old adhesive lumps telegraph through.
Step 4: Set the new tile
- Test-fit the new tile — it should sit slightly below the surrounding tiles (the adhesive and grout build it up flush).
- Spread tile adhesive on the substrate with a notched trowel (or butter the tile’s back for small tiles).
- Press the tile firmly into place, wiggling slightly to bed it in the adhesive.
- Check it’s level with neighbors — use a straightedge across the surrounding tiles.
- Let the adhesive cure fully (24 hours for mastic, longer for thinset — read the product).
Step 5: Grout and finish
- Mix grout per instructions (or use pre-mixed).
- Press grout into the joints with a grout float at a 45-degree angle, working diagonally across the joints.
- Wait 15-20 minutes, then wipe with a damp (not wet) sponge in circular motions to clean the tile faces.
- After haze forms, buff with a dry cloth.
- Keep the area dry for 48-72 hours while grout cures.
- Seal the grout after full cure (see grout cleaning and sealing).
Mistakes to Avoid
- Skipping the grout removal: Trying to pry the tile without cutting grout first transfers force to neighboring tiles. Always isolate first.
- Chiseling outward: Mentioned twice because it’s the top cause of collateral damage.
- Grouting before adhesive cures: The tile shifts, the grout cracks, and you’re redoing it next month.
- Wrong grout color: Even slightly-off grout draws the eye. Bring a grout sample chip to match, and remember wet grout dries lighter.
- Forgetting to seal: Unsealed grout in a bathroom stains within months.
If the broken tile is part of broader bathroom wear, updating the bathroom without remodeling covers the full refresh — and small-bathroom storage helps while you’re at it.
Tile Layout Patterns Worth Knowing
If you’re replacing more than one tile, the layout pattern affects both difficulty and appearance. Grid (stacked): tiles aligned in straight rows and columns — modern, clean, easiest for DIY alignment. Running bond (subway): offset by half a tile — classic, hides minor size variations, slightly trickier to keep level across rows.
Herringbone: dramatic and high-end, but genuinely difficult — every cut is angled, waste is high (order 15-20% extra), and keeping it square requires constant checking. Not a first-timer pattern. Diagonal: tiles at 45° — makes small bathrooms feel larger, but every edge tile needs cutting. Beautiful when done well; budget extra tile and time.
For single-tile replacement, match the existing pattern (obviously) — but note the grout joint width. Modern installations use 1/16″ joints; older ones 1/4″. Your replacement grout lines must match the neighbors’ width, or the repair stands out. Tile spacers ($5/bag) ensure consistency.
One more consideration: if the broken tile is in a wet area (shower floor, tub surround), check the waterproofing behind it when the tile is out. Damaged waterproofing membrane means water has been reaching the substrate — a bigger issue than the tile. The Tile Council of North America’s homeowner guides explain proper wet-area installation standards, useful if you discover the original job was substandard.
Tile Replacement: Quick Answers
Can I replace tile without removing grout first? Don’t try — prying without cutting the grout transfers force to neighboring tiles and cracks them. The grout saw step is non-negotiable.
What if I can’t find a matching tile? Check salvage shops and eBay for discontinued tile, or replace a small cluster with a deliberate accent pattern — it looks intentional where one mismatched tile looks like a mistake.
How long before I can use the shower? Keep the repaired area dry 48-72 hours while grout cures, then seal. Rushing this step is the top cause of redone repairs.
The Bottom Line
Replace a broken bathroom tile by: matching the tile (buy extras), cutting out surrounding grout, breaking out the old tile chiseling toward center, bedding the new tile level in adhesive, grouting after full cure, and sealing. About $20 in materials and an hour of active work for a repair that’s invisible when done right. That cracked tile that’s been mocking you every morning? Gone by this weekend.